Port forwarding is a crucial feature for enabling external access to devices on your home network, whether for gaming, remote desktop applications, or hosting servers. However, encountering issues where port forwarding is not working on your Netgear router can be frustrating. Many factors could be responsible, including incorrect configurations, ISP-imposed restrictions, or firewall interference. The good news is that most port forwarding problems can be fixed with systematic troubleshooting. If you’re wondering how to fix port forwarding not working on Netgear router, this guide outlines the most common causes and provides a step-by-step process to resolve them efficiently. Whether it's adjusting router settings, verifying IP configurations, or disabling conflicting features, following these troubleshooting methods will help restore proper port forwarding functionality on your Netgear router and ensure seamless connectivity.

Common Causes of Port Forwarding Issues on Netgear Routers
Incorrect Router Configuration
A major reason port forwarding fails is incorrect router configuration. Netgear routers require precise settings to enable port forwarding successfully. Misconfigured port numbers, incorrect IP addresses, or selecting the wrong protocol (TCP/UDP) can all result in failed forwarding. It's essential to ensure that the internal IP address being forwarded matches the correct device. Additionally, firmware-related issues can cause misconfigurations. If your router’s firmware is outdated or incompatible with certain port forwarding settings, it may prevent rules from working correctly. To prevent such problems, always double-check the assigned IP, verify that the correct ports are specified, and ensure that the firmware is updated to the latest version available from Netgear. A misconfigured router can silently block port forwarding, so reviewing these settings carefully is a crucial step in troubleshooting.
ISP Restrictions
Another common obstacle to successful port forwarding is ISP-imposed restrictions. Many Internet Service Providers block certain ports to prevent residential users from running services that typically require business-class Internet plans. If you find that no matter how you configure port forwarding, it still doesn't work, your ISP may be blocking the specific ports you need. To confirm this, contact your ISP and ask if any port restrictions are in place. Some ISPs use Carrier-Grade NAT (CGNAT), which prevents external devices from directly accessing your network. If this is the case, you may need to request a static public IP address or opt for an ISP-provided solution to allow port forwarding. Testing with different ports can also help determine if your ISP is blocking specific ranges, giving you a clearer picture of potential restrictions.
Firewall or Security Software Interference
Firewalls and security software are designed to protect your network, but they can also interfere with port forwarding. Many Netgear routers have built-in firewall settings that could block forwarded traffic, even if the configuration appears correct. Check your router’s firewall settings and make sure port forwarding rules are not being restricted. Additionally, security software installed on connected devices, such as antivirus programs and third-party firewalls, can sometimes block incoming traffic on specific ports. To troubleshoot this, temporarily disable security software and test whether port forwarding starts working. If disabling security features resolves the issue, you can then adjust settings to allow necessary traffic while maintaining security. Properly configuring both router-level and device-level firewall settings is crucial for ensuring seamless port-forwarding functionality on your Netgear router.
How to Fix Port Forwarding Not Working on Netgear Router
Step 1: Verify Your Public IP Address
The first step in troubleshooting is verifying whether your public IP address matches the one configured in your router. Log in to your Netgear router’s admin panel and navigate to the WAN settings. Compare the displayed public IP with an external IP lookup service, such as "What’s My IP." If the IPs do not match, your ISP may be using a private or shared IP (CGNAT), preventing external access. In such cases, port forwarding will not work until you request a public IP address from your ISP. Additionally, ensure your router is not set to double NAT mode, as this can also disrupt port forwarding. If you are using multiple routers, placing your Netgear router in bridge mode may help resolve conflicts. Checking and verifying the correct IP address ensures that your router is forwarding traffic to the right destination.

Step 2: Assign a Static IP to Your Device
Port forwarding rules require consistency in IP addressing, meaning that if your device’s IP changes, the forwarding settings will break. By default, most routers assign dynamic IPs using DHCP, which can lead to port forwarding inconsistencies. To prevent this, assign a static IP to the device requiring port forwarding. Access your Netgear router’s admin panel, navigate to LAN settings, and manually set a static IP address by associating it with the device’s MAC address. Ensure the assigned IP falls outside the DHCP range to avoid conflicts. If your device’s IP is constantly changing, even after setting static rules, consider using IP reservations within the DHCP settings to maintain a consistent internal address. A static IP ensures that port forwarding rules remain correctly applied, eliminating one of the most common issues users face.
Step 3: Configure Port Forwarding Rules Correctly
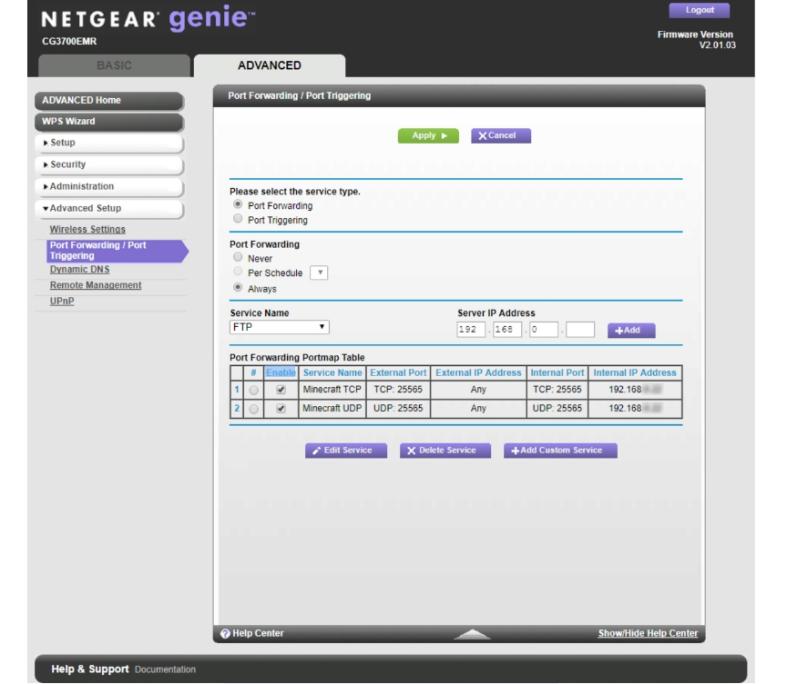
To successfully forward ports, the correct rules must be configured in the Netgear router’s admin panel. Log in and navigate to Advanced > Port Forwarding/Port Triggering. Add a new rule by specifying the internal IP address of your device, entering the required port numbers, and selecting the appropriate protocol (TCP, UDP, or both). Avoid common mistakes like incorrect port ranges or typos in IP addresses. If your application requires multiple ports, create separate rules as needed. Additionally, some Netgear routers have a “Default DMZ” setting, which, if enabled, may interfere with port forwarding. Ensure that DMZ is either properly configured or turned off to avoid conflicts. Verifying and correctly setting up port forwarding rules ensures that traffic reaches the intended device, allowing applications to function properly.
Step 4: Disable Conflicting Settings
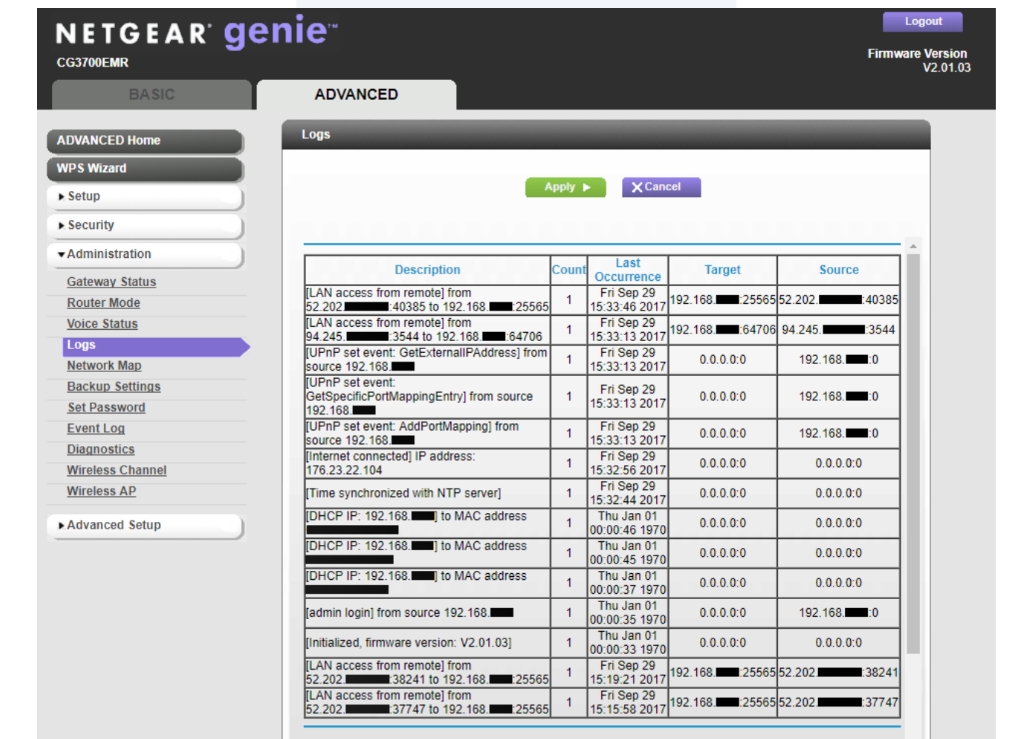
Certain settings within your Netgear router may interfere with port forwarding. UPnP (Universal Plug and Play) automatically opens ports for applications but can sometimes override manual forwarding rules, causing conflicts. Navigate to your router settings and disable UPnP to test if this resolves the issue. Similarly, DMZ (Demilitarized Zone), if enabled, may route all traffic to a single device, bypassing specific port forwarding rules. Temporarily turning off QoS (Quality of Service) settings can also help, as they might be prioritizing network traffic in a way that affects forwarding functionality. If disabling these settings fixes the issue, leave them off or reconfigure them to work harmoniously with your port forwarding setup.
Step 5: Test the Port Forwarding Setup
Once all configurations are in place, the final step is to test your port forwarding settings. Use an online port checker tool or a command prompt test (e.g., netstat or telnet) to verify that the port is open and accessible. If the test shows the port as closed, revisit your settings to ensure no mistakes were made. Additionally, restart both the router and the target device to apply changes. If issues persist, double-check firewall settings, ISP restrictions, and NAT configurations. Running a ping test can also help determine if the forwarded port is receiving external traffic. Properly testing the setup ensures that all troubleshooting steps have been implemented correctly, leading to a working port forwarding configuration.
Conclusion
Port forwarding issues on a Netgear router can often be resolved through careful troubleshooting. By verifying your public IP address, assigning a static IP, ensuring correct forwarding rules, and disabling conflicting settings, you can identify and fix most issues. If problems persist, testing the setup with online tools and contacting your ISP or Netgear support can provide additional solutions. Ensuring that firewalls, router firmware, and security settings are correctly configured will help maintain stable port forwarding functionality. If you're struggling with how to fix port forwarding not working on Netgear router, following these steps ensures that your Netgear router forwards ports efficiently, allowing seamless connectivity and improved network performance.
FAQ
How do I know if my ISP is blocking port forwarding?
Contact your ISP and ask directly about any port restrictions. You can also test different ports that are less commonly blocked. If some work while others don’t, it’s a sign of ISP-imposed port restrictions.
Can UPnP settings affect port forwarding on my Netgear router?
Yes, UPnP can create dynamic port forwarding rules that may interfere with manually set ones. Disabling UPnP temporarily can help determine if it’s causing conflicts.
Is it safe to disable the router’s firewall for port forwarding?
Disabling the firewall can expose your network to security risks. Instead, modify firewall settings to permit specific ports, ensuring needed access while maintaining security.